Category: Blog
-
Locks for a Thick Door: Where Do You Get Them?
Update: in a huge upset to the industry and customers alike, Napco/Alarm Lock have stopped selling their locks for thick doors. There isn’t much that we can do except migrate these customers away from the Alarm Lock ecosystem to the Schlage or Kaba ecosystem unless Napco figures out that this is mabye a bad idea.…
-
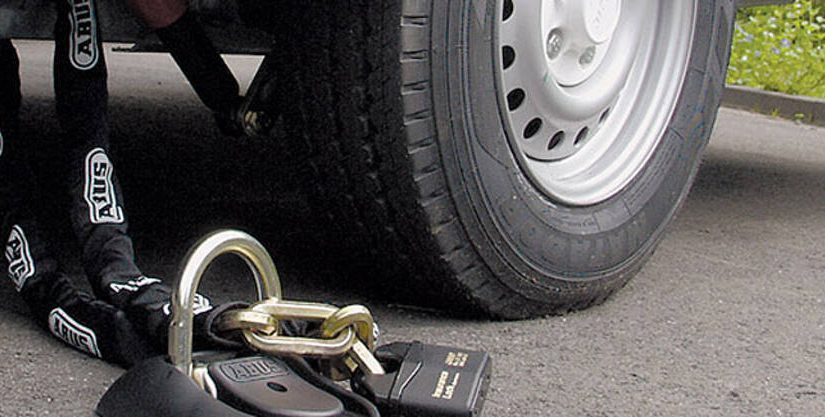
How to Prevent Theft of Outdoor Objects
Thieves are more desperate and using boltcutters to steel things. It can be prevented.
-
Can Somebody Hack my Electronic Lock?
The short answer is: yes, there are ways to unlock your electronic lock but you probably have nothing to worry about; the people with the knowledge to do so most likely have bigger fish to fry. To protect against unauthorized entry we must consider motivations for the would-be intruder. The most obvious one is theft.…
-
Keyless lock lockouts: how to prevent and get back inside
There are lots of ways to get locked out with an electronic lock. The most common reasons are that there is a keyed lock elsewhere on the door that is locked, or the electronic lock’s battery died. If you are having this problem figure out which lock isn’t working by sliding a card between the…
-
Hacks: Stop Using Incorrect Mortise Lock Spindles Please!
Two days and two people locked inside because somebody halfassed the replacement of the knob spindle on a mortise lock. Yesterday I had a customer who wanted to show a condo but people kept getting stuck inside the unit after they shut the door. This wasn’t a strong selling point. To get out somebody had…
-
When Shoddy Work Causes Break-ins
Today I went out to fix a lock after somebody broke in over the night. The owner thought they used lockpicks after watching the security camera video but the telltale signs of somebody using a wrench were on the lock cylinder and its housing. Whenever somebody can put a wrench on the physical lock cylinder…
-
Masterlock Keysafe Weaknesses
Careful with the key safes. If you cheap out you could end up spending a lot more if somebody busts it open and gets the key out. A good one costs close to $100 which is much less than it costs to have a locksmith come out and rekey a building with numerous keyed entries.…
-
How to address “sticky” mortise lock knobs
One of the problems endemic to people with houses more than 100 years old is inevitably the sticky mortise lock knob. This is probably a lock on an original door with a crystal glass knob but it could also be brass. When you turn the knob the latch doesn’t spring back out. There are a…
-
Do you really need a locksmith?
There are a few situations I kind of wish people wouldn’t call me out on. Not because I don’t want the money. More because people could do the job easily themselves. Of course there are two groups of customers, those who have the time to do it themselves and those who don’t. Before calling me…